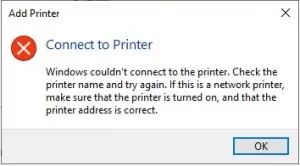
Troubleshooting printer sharing errors in Windows involves several steps. Here’s a guide to help you resolve common issues:
1. Check Network Connection
- Ensure that both the host (the computer with the printer) and the client (the computer trying to access the printer) are connected to the same network.
- Check the connectivity by pinging the host from the client using Command Prompt (
ping [host IP address]).
2. Printer Status
- Confirm that the printer is powered on and has paper and ink/toner.
- Ensure the printer is set to “Online” and there are no error messages on its display.
3. Check Sharing Settings
- On the host computer, go to Settings > Devices > Printers & Scanners.
- Select the printer, click on Manage, and choose Printer Properties.
- Go to the Sharing tab and ensure the option “Share this printer” is checked.
- Make sure to note the share name, as it will be needed for connecting from the client.
4. Firewall and Antivirus Settings
- Check that the firewall or antivirus software is not blocking the printer sharing.
- Temporarily disable them and see if you can access the printer. If it works, adjust the settings to allow printer sharing.
5. Network Profile
- Ensure both computers are on the same network profile (private or public). Set both to private for easier sharing.
- Access this by going to Settings > Network & Internet > Status > Network properties.
6. Printer Drivers
- Ensure the correct printer drivers are installed on both the host and client machines.
- You can use the Device Manager to update drivers.
- On the client side, access Control Panel > Devices and Printers > Add a Printer and select the shared printer.
7. Use the Correct Path to Connect
- In the client machine, use the correct syntax to connect:
\\[Host-computer-name]\[Shared-printer-name] - Replace
[Host-computer-name]with the name of the computer hosting the printer and[Shared-printer-name]with the share name noted earlier.
8. Printer Spooler Service
- Check if the Printer Spooler service is running:
- Press
Windows + R, typeservices.msc, and hit Enter. - Find Print Spooler, right-click it, and choose Restart if it’s running, or Start if it’s stopped.
- Press
9. Check Group Policies
- If you’re in a domain environment, ensure that Group Policy settings are not restricting printer sharing.
10. Try Re-adding the Printer
- On the client machine, remove the printer and re-add it using the method described above in step 7.
Additional Tips
- Ensure both computers have the same version of Windows or compatible versions for better compatibility.
- Check for Windows Updates which might include fixes for printer sharing issues.
- For advanced troubleshooting, consulting event logs can provide insights into what might be going wrong (via Event Viewer).
If the problem persists after following these steps, consider checking manufacturer’s documentation for specific troubleshooting steps related to the printer model.
